
The Bambu Lab A1 is an exceptional 3D printer, but out of the box, the AMS Lite has two obvious Achilles' heels:
- The Desk Footprint Tax: The stock AMS Lite stand sits right beside the machine, gobbling up nearly double the horizontal desk space of the printer alone.
- The Open-Air Humidity Trap: The four spools spin in open air. In any humid climate or rainy monsoon week, hygroscopic filaments like PETG, TPU, and even high-flow PLA absorb airborne moisture within days, resulting in steam pops, stringing, and ruined surface finishes.
I wanted the footprint of a standalone printer and the environmental isolation of a sealed CoreXY dry box. So I combined two brilliant community engineering projects from MakerWorld: the AMS Lite Top Mount with Z-Axis Stiffeners and the Ultimate Filament Spool Enclosure Type 01.
Here is the complete teardown of the build, the mechanical resonance considerations, and an interactive 3D anatomy breakdown of how it all bolts together.
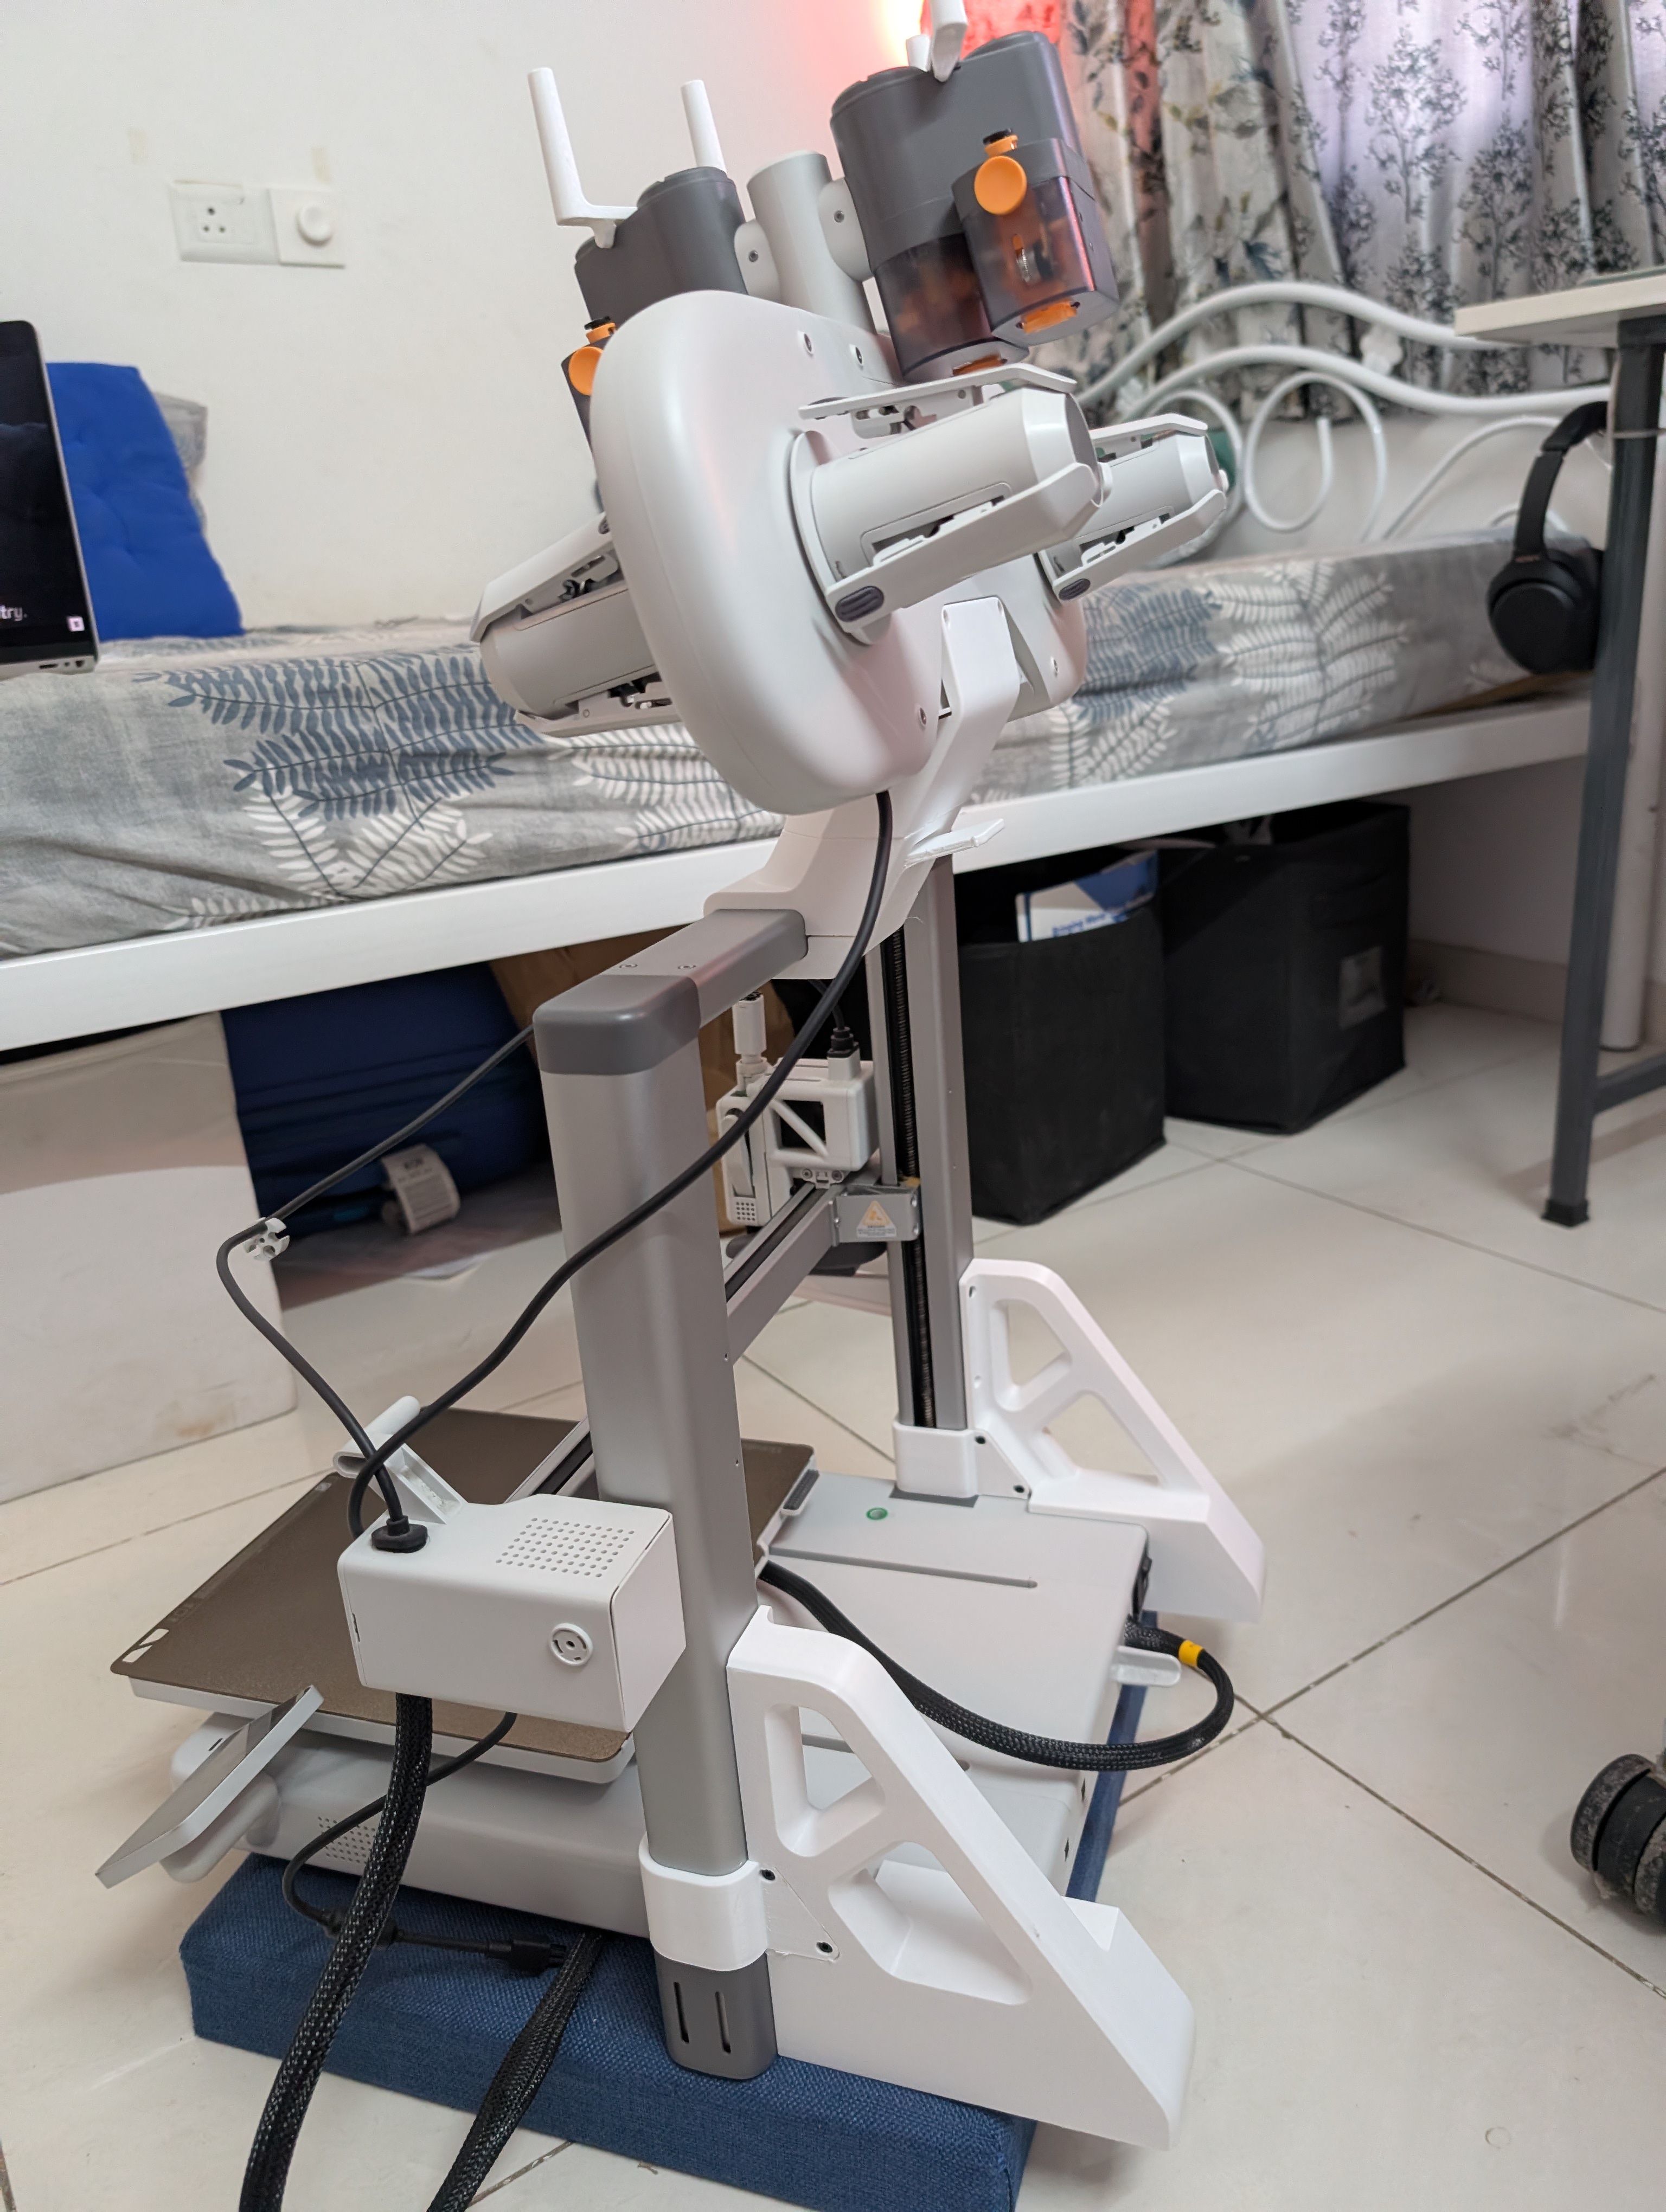
The completed rig: AMS Lite perched atop the gantry, enclosed in dry capsules with silica desiccant, reinforced by dual diagonal truss stiffeners.
The Engineering Problem: Weight Up High
Moving the AMS Lite to the top beam seems straightforward until you do the physics: four 1 kg spools + the AMS feeder mechanism = roughly 5 to 6 kg of dead weight perched 40 centimeters above the printer base.
At acceleration speeds of 500 mm/s and jerky direction changes on the X-axis, that high center of mass turns the vertical aluminum extrusions into an inverted pendulum. Without structural reinforcement, the frame resonates, producing visible ringing, ghosting, and layer shifts in tall prints.
That is why the top mount model by author A2L includes dual Z-Axis Stiffener Braces:
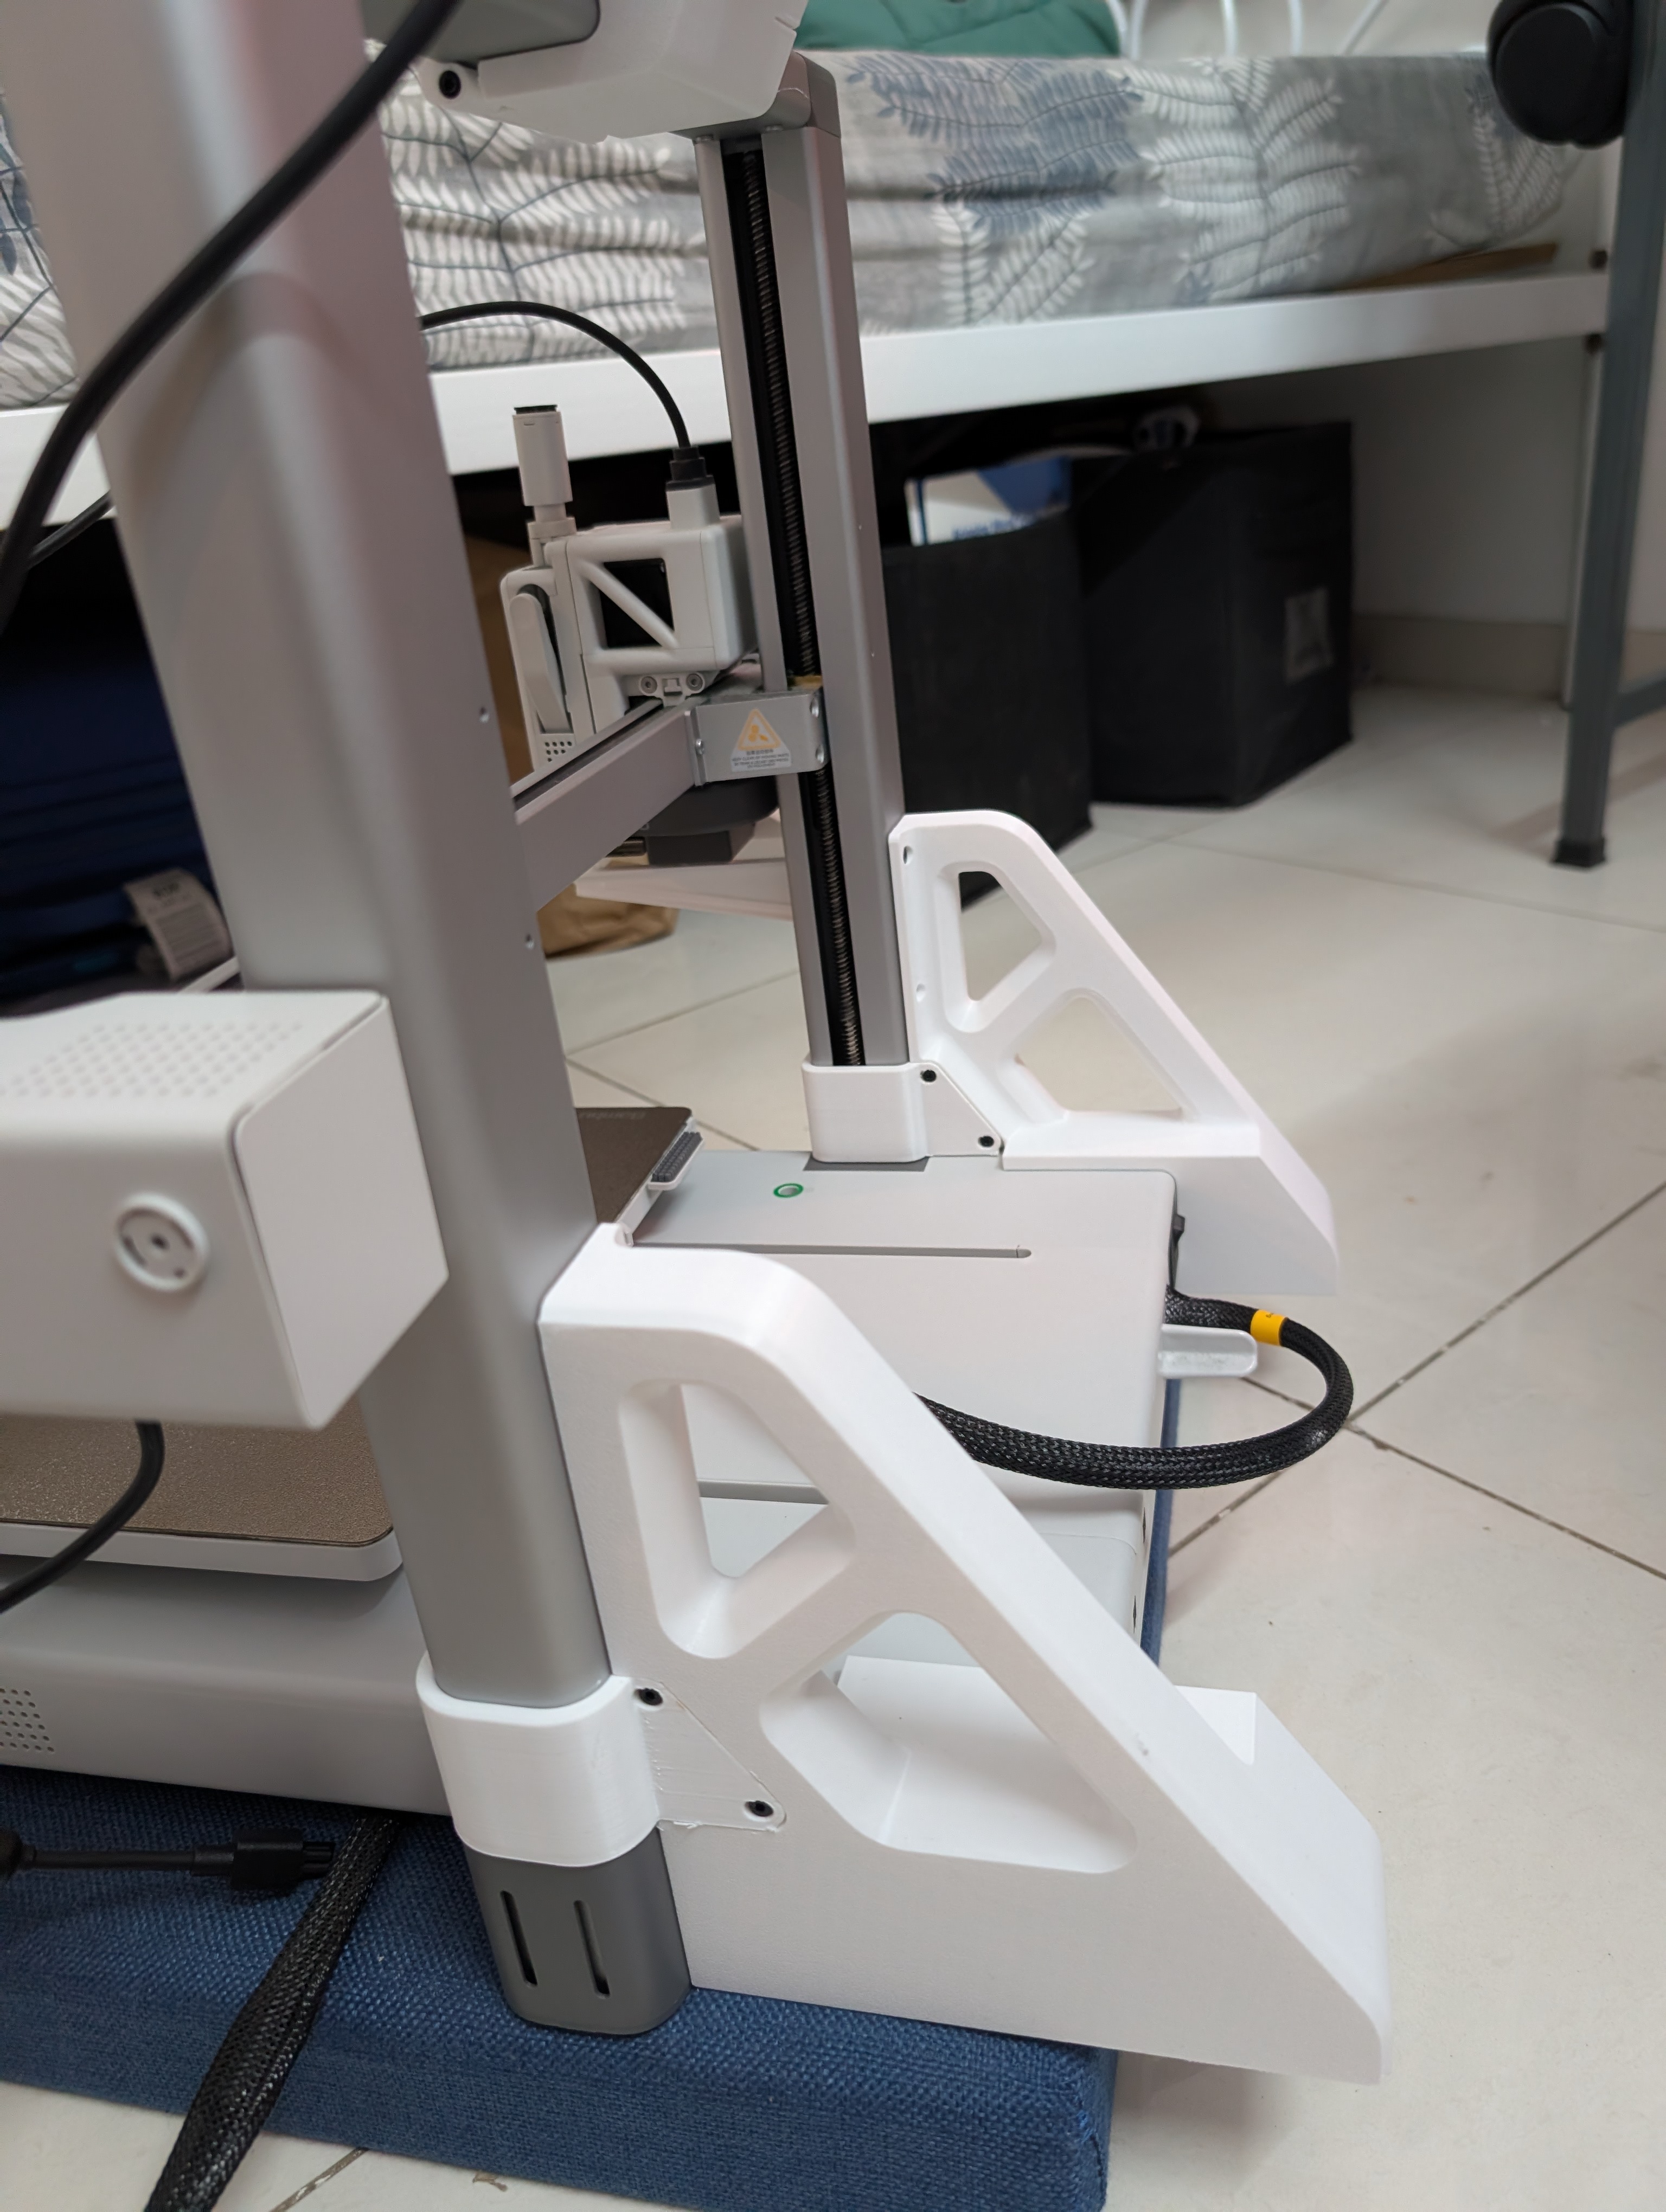
The printed white PETG truss brace clamps directly onto the vertical extrusion with M3 hardware and plants a rubber dampener foot firmly onto the table, creating a rigid triangle.
These braces clamp securely around the vertical extrusions and extend backward at a 45-degree angle to the table surface. This triangulates the gantry, eliminating fore-and-aft wobble completely.
Interactive Anatomy: The Complete Rig Breakdown
Explore the interactive isometric assembly below. Drag the Explode Assembly slider to see how the top mount saddle clamps over the horizontal beam, select active filament feed paths, and test the sealed dry box humidity difference:
Anatomy of the Top Mount Clamp (MakerWorld #92486)
The top mounting bracket consists of three primary mechanical sections:
- The Lower Saddle: Contoured to match the rounded top aluminum crossbeam of the A1.
- The Underside Latch: Slips beneath the beam and pulls tight against the saddle using four M3 hex socket screws, locking the bracket with zero slip.
- The Rotary Wedge Column & Lock Knob: A knurled screw drives a wedged clamp block against the AMS Lite's central post, letting you rotate the feeder orientation before cinching it down.
Once torqued down, the mount feels like a monolithic extension of the A1's aluminum chassis.
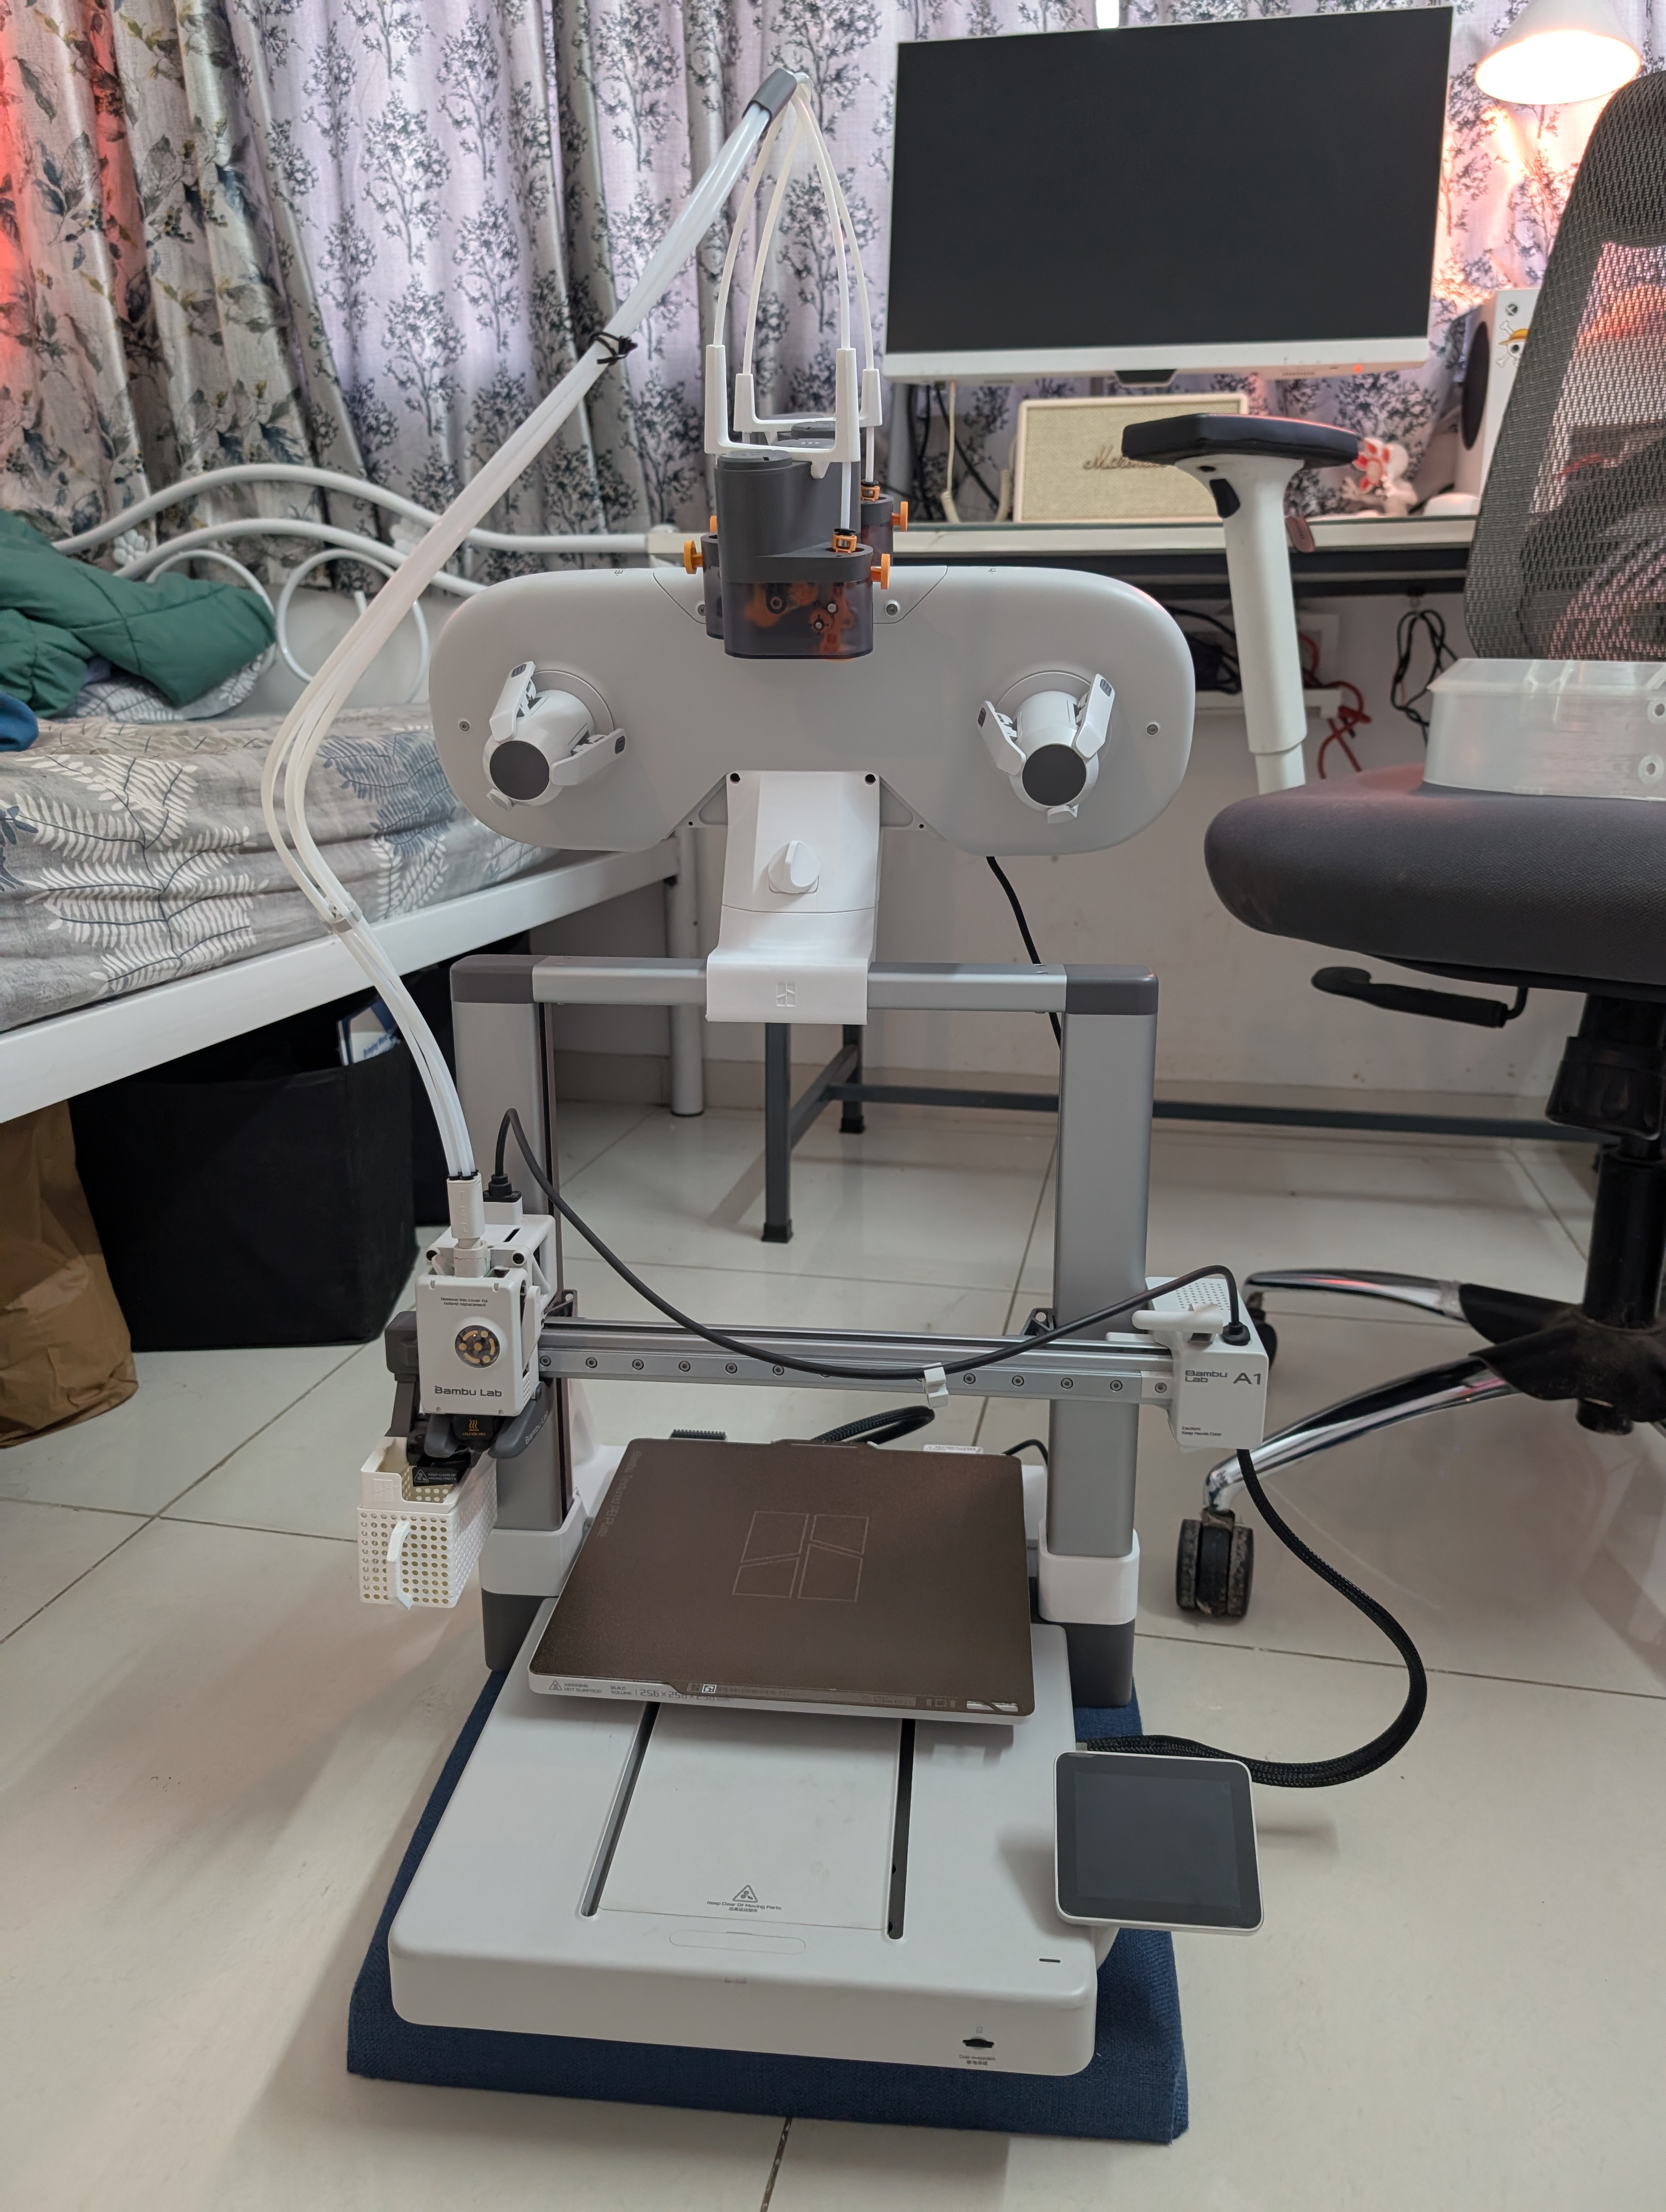
Front elevation: Notice the clean, symmetrical arc of the four PTFE tubes plunging straight down into the toolhead extruder hub without any horizontal desktop draping.
The Enclosure: Ultimate Spool Dry Box (MakerWorld #486153)
Having the AMS Lite up top was great for space, but my filament was still exposed to room air. The Ultimate Filament Spool Enclosure Type 01 solves this by enclosing the rotating spools inside modular cylindrical shells:
- Integrated Dual LCD Hygrometers: The central bridge houses two digital round sensor gauges displaying temperature and real-time relative humidity (% RH).
- Desiccant Cartridge Bays: Beneath the spools sit dedicated silica gel hopper bays. The bright orange silica beads continuously strip moisture from the sealed air.
- Perimeter Butterfly Latches: Modular snap-latches clamp the translucent covers to the backing plate, creating an airtight seal with rubber gasket seals.
- Low-Friction Filament Guides: PTFE pass-through fittings route filament directly from the sealed chamber into the AMS feeder funnel.
The Humidity Test
In my room, ambient humidity hovers around 65% to 70% RH. Within 6 hours of loading fresh orange silica gel into the enclosure hoppers and snapping the covers shut:
- Internal Chamber Humidity: dropped to 14% RH.
- PETG Print Results: Zero stringing, glassy surface finish, and completely eliminated moisture popping at the nozzle.
The Rig in Action
Here is the printer running a multi-color print with the top mount and enclosure fully installed:
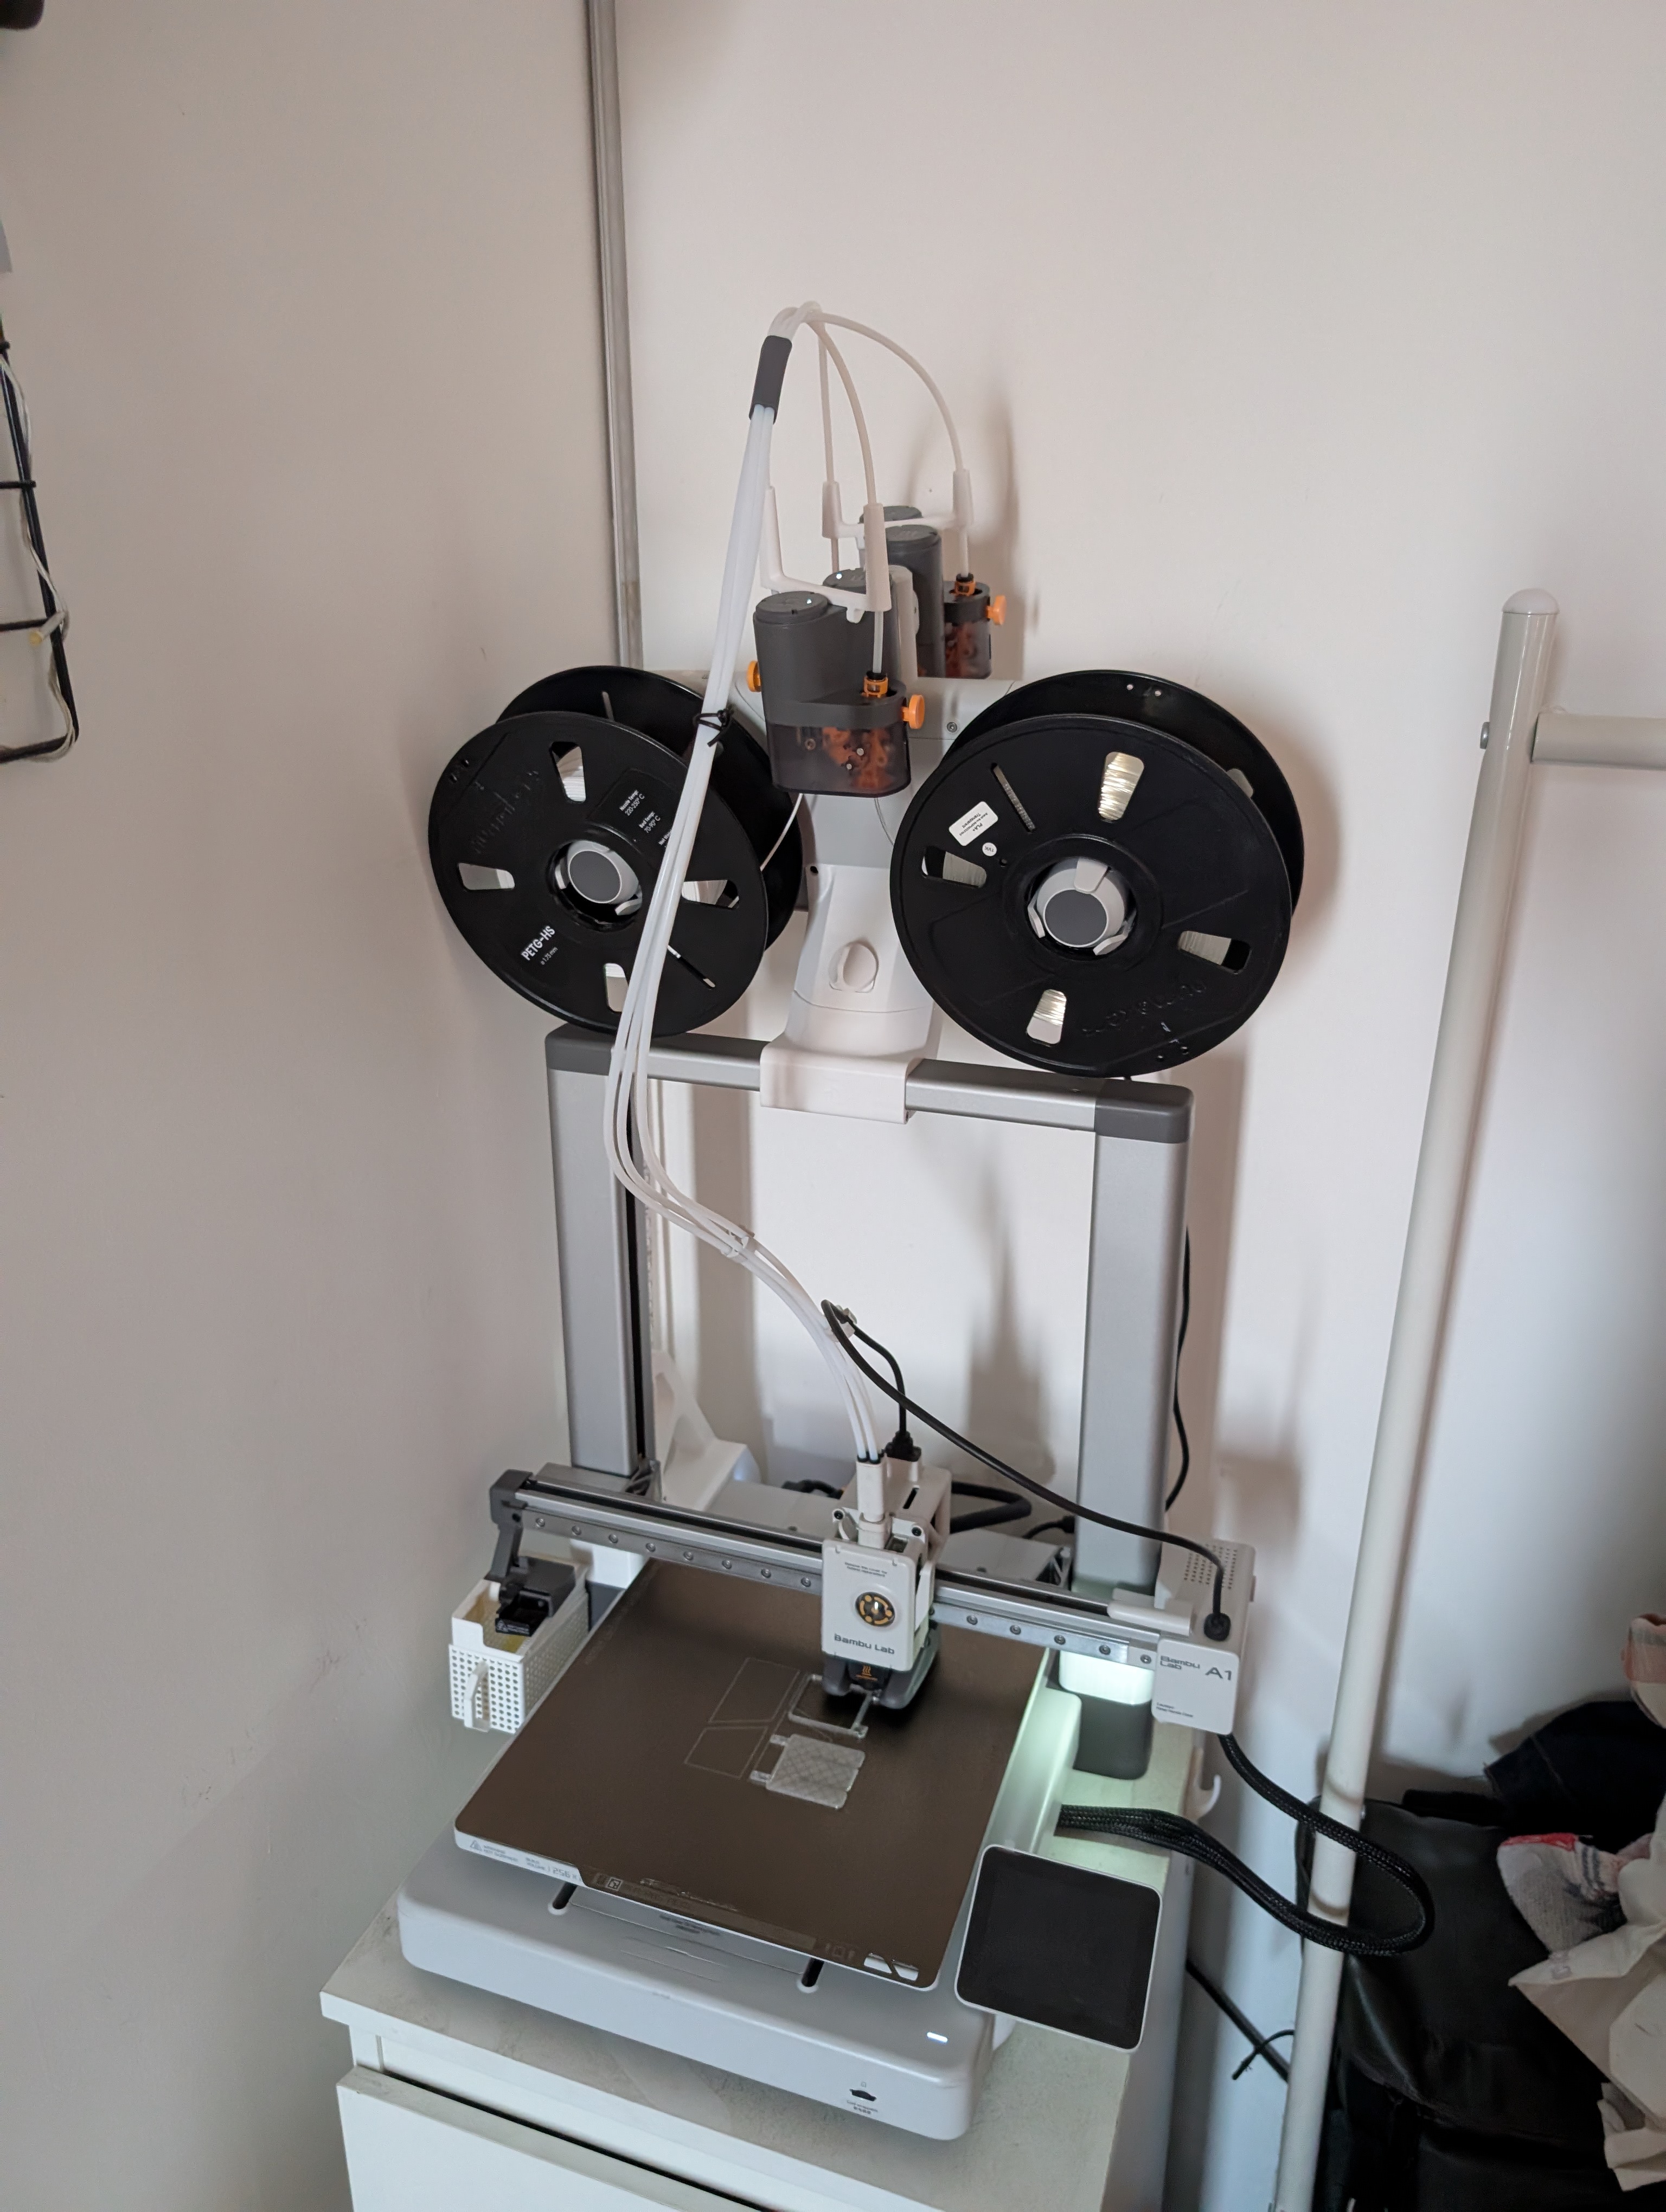
Printing with spools fed from the top dry capsules.
And here is a live clip of the rig running at full print speed:
Bill of Materials & Print Settings
If you want to build this for your own A1, here is what you need:
3D Printed Parts
- AMS Lite Top Mount & Z-Stiffeners: MakerWorld Model #92486
- Ultimate Filament Spool Enclosure Type 01: MakerWorld Model #486153
- Material: PETG or tough PLA+ (PETG is strongly recommended for the structural clamps and gantry braces due to fatigue resistance and higher heat deflection).
- Walls / Infill: 4–5 walls, 25% gyroid infill for rigidity.
Hardware & Electronics
- 8× M3 × 10mm (or M3 × 12mm) tapping/machine screws
- 2× M3 × 23mm (or longer) socket screws for the underside latch
- 2× Round digital LCD mini hygrometer/thermometers (44mm diameter)
- 2× Round silicone / rubber dampener feet for the truss braces
- ~150g Orange color-indicating silica gel desiccant beads
The Verdict
This combined mod transforms the Bambu A1 into a compact, self-contained multi-material powerhouse.
By taking the AMS Lite off the desk, I reclaimed over 60% of usable desk workspace, and the sealed Type 01 dry capsules keep sensitive engineering filaments dry and ready to print 24/7 without needing a standalone filament dryer running on the side.
Check out more of my builds, mods, and functional prints in the 3D Prints Gallery.